As a seasoned technician with over a decade of hands-on experience in stand mixer repair and evaluation, I’ve seen countless machines pass through my workshop. One of the most common, yet often overlooked, issues that can drastically impact your baking results is improper beater-to-bowl clearance. Whether you’re a home baker perfecting your sourdough or a professional chef whipping up delicate meringues, a perfectly calibrated stand mixer is your best ally. This guide will walk you through everything you need to know to properly adjust your stand mixer, ensuring every ingredient is incorporated flawlessly and your appliance operates at its peak.
1. Understanding Beater-to-Bowl Clearance: The Foundation of Perfect Mixing
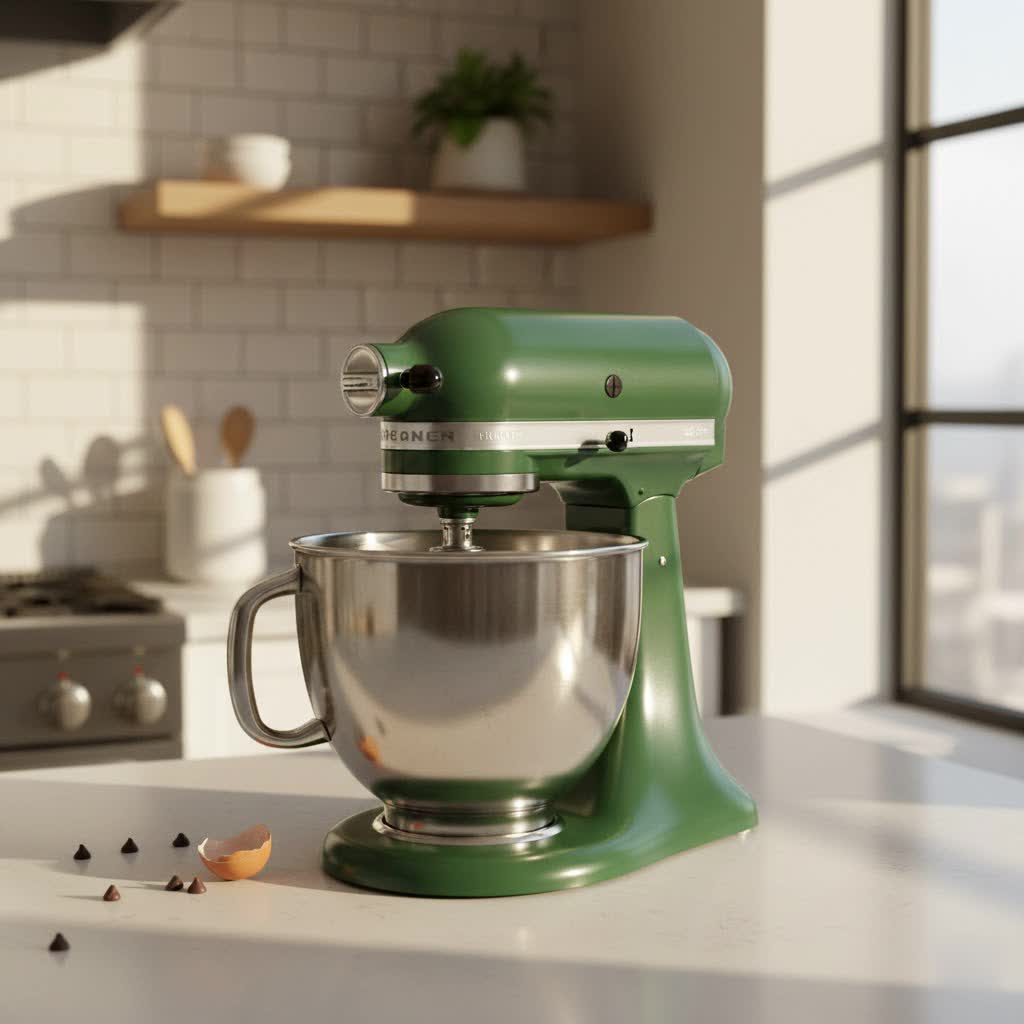
What exactly is beater-to-bowl clearance? Simply put, it’s the precise distance between the bottom edge of your stand mixer’s attachment (like the flat beater, whisk, or dough hook) and the inner surface of the mixing bowl when the attachment is in its lowest, working position. This tiny gap, often just a fraction of an inch, is fundamental to optimal stand mixer performance.
Why is precise clearance crucial for optimal stand mixer performance? When the clearance is too wide, ingredients at the bottom or sides of the bowl are left unmixed, leading to lumpy batters, unincorporated dry ingredients, or poorly kneaded dough. On the other hand, if the clearance is too tight, the attachment can scrape against the bowl, causing metallic flecks in your food, damaging both the attachment and the bowl, and even straining your stand mixer’s motor. Proper adjustment ensures all ingredients are thoroughly combined, achieving the perfect texture and consistency for your culinary creations.
2. Recognizing the Signs: When Your Stand Mixer Needs Adjustment
Your stand mixer often communicates its need for adjustment through clear signals. As someone who has spent years diagnosing these machines, I’ve come to recognize these indicators instantly.
Common symptoms of improper clearance include:
- Ingredients Sticking: You notice unmixed flour, sugar, or butter clinging to the bottom or sides of the bowl, even after extended mixing. This is a tell-tale sign the attachment isn’t reaching far enough.
- Scraping or Grinding Noises: A harsh metallic sound during operation suggests the beater is making direct, forceful contact with the bowl. This not only wears down your attachments but can also damage the bowl’s finish.
- Uneven Texture: Your doughs are inconsistent, or your batters have streaks of unmixed components, indicating that the attachments aren’t efficiently circulating all ingredients.
- Head Wobble (Tilt-Head Models): In some cases, an improperly adjusted head, especially in tilt-head stand mixers, can cause excessive wobble during operation, further exacerbating clearance issues.
The importance of addressing these signs promptly cannot be overstated. Ignoring these symptoms can lead to sub-par results, wasted ingredients, and potentially costly repairs down the line. A few minutes spent on adjustment can save your stand mixer and elevate your cooking.
3. The “Dime Test”: A Simple Way to Check Clearance
For most home bakers, particularly those with KitchenAid stand mixers, the “dime test” is the industry-standard method for checking beater-to-bowl clearance. It’s a quick, visual, and effective way to gauge if your mixer is properly calibrated.
Here’s a step-by-step guide for performing the dime test:
- Safety First: Ensure your stand mixer is turned off and unplugged from the power outlet.
- Attach the Flat Beater: Secure the flat beater attachment to your mixer. This attachment is typically used for the test because it has a broad surface area, making contact with the bowl’s bottom and sides more apparent.
- Place the Bowl and Lower the Head/Bowl: Secure your mixing bowl onto the stand mixer. For tilt-head models, lower and lock the head. For bowl-lift models, raise and lock the bowl in its mixing position.
- Insert a Dime: Drop a standard dime into the empty mixing bowl.
- “Mix” the Dime: Turn your stand mixer on its lowest speed setting.
Interpreting the results:
- Too High: If the dime remains stationary or barely moves, the flat beater is too high and not reaching the bottom of the bowl effectively.
- Too Low: If the dime is being violently pushed around, scraping loudly, or getting jammed under the beater, the attachment is too low and making excessive contact.
- Just Right: The ideal clearance is when the dime slowly but consistently travels around the bottom of the bowl, moving a quarter to a half-inch with each pass of the beater. It should not be stuck, nor should it be flung around aggressively.
“A perfectly set clearance isn’t just about smooth batter; it’s about extending the life of your stand mixer and ensuring consistent, professional-quality results every single time.” – Admin, ReviewRM
4. Step-by-Step Adjustment Guide for Common Stand Mixer Types
Before you begin any adjustments, always prioritize safety. Ensure your stand mixer is completely unplugged from the wall outlet. This simple step prevents accidental startup and potential injury.
For KitchenAid Tilt-Head Stand Mixers
These popular models are characterized by a head that tilts back for easy access to the bowl and attachments.
- Prepare for Adjustment: Unplug your stand mixer. Tilt the head back and lock it into place.
- Locate the Adjustment Screw: Look for a small, usually slotted, screw located in the hinge area where the mixer head connects to the body. This is your beater height adjustment screw.
- Adjusting the Beater Height:
- To lower the beater (increase contact with the bowl bottom), turn the screw clockwise (to the right).
- To raise the beater (decrease contact with the bowl bottom), turn the screw counter-clockwise (to the left).
Our Picks for the Best Stand mixer in 2026As an Amazon Associate I earn from qualifying purchases.Num Product Action 1 Stand Mixer Body with Stainless Steel Cladding Pro-Grade Powerful Kitchen Mixer for Baking Bread Dough Cake 10+p Speed Tilt-Head Electric Food Mixer With 6.5QT Bowl Dough Hook Wire Whisk Flat Beater 
2 Hamilton Beach Electric Stand Mixer, 4 Quarts, Dough Hook, Flat Beater Attachments, Splash Guard 7 Speeds with Whisk, Black
3 Stand Mixer, Kitchen in the box 3.2Qt Small Electric Food Mixer,6 Speeds Portable Lightweight Kitchen Mixer for Daily Use with Egg Whisk,Dough Hook,Flat Beater (Purple)
4 KitchenAid Classic Series 4.5 Quart Tilt-Head Stand Mixer K45SS, Onyx Black
5 Martha Stewart Tilt-Head Stand Mixer, 12 Speed, 5.3QT Stainless Steel Bowl, Splash Guard with Pour Chute, Whisk, Dough Hook, Flat Beater, Electric Kitchen Baking Mixer, Bread, Cake, Whip, Linen White
6 KitchenAid Classic Series 4.5 Quart Tilt-Head Stand Mixer K45SS, White
7 Kitchen in the box Stand Mixer,3.2Qt Small Electric Food Mixer,6 Speeds Portable Lightweight Kitchen Mixer for Daily Use with Egg Whisk,Dough Hook,Flat Beater (Black)
8 Hamilton Beach Electric Stand Mixer, 4 Quarts, Dough Hook, Flat Beater Attachments, Splash Guard, 7 Speeds with Whisk, Easy-Carry Top Handle, Red
9 Camic Stand Mixer, 4.2QT+5.3QT Two bowls Electric Food Mixer, 10 Speeds with Digital setting 3-IN-1 Kitchen Mixer for Baking Cakes Cookie Bread Salad with Egg Whisk,Dough Hook,Flat Beater (Black)
10 KitchenAid Artisan Series 5 Quart Tilt Head Stand Mixer, KSM150PS, Juniper
- Small Adjustments are Key: Make only small turns, about a quarter-turn at a time. Over-adjusting can lead to the opposite problem or damage.
- Test and Repeat: Lower the mixer head, perform the dime test, and make further small adjustments as needed until the dime moves appropriately.
For KitchenAid Bowl-Lift Stand Mixers
Bowl-lift models feature a stationary head, with the bowl raising and lowering into position via a lever.
- Prepare for Adjustment: Unplug your stand mixer. Place the bowl-lift lever in the down position.
- Locate the Adjustment Screw: The adjustment screw for bowl-lift models is typically found on the mixer’s body, behind where the bowl sits, usually between the locking arms. It might be recessed.
- Adjusting the Bowl Height (and thus beater clearance):
- To lower the bowl (making the beater closer to the bowl bottom), turn the screw clockwise (to the right).
- To raise the bowl (making the beater further from the bowl bottom), turn the screw counter-clockwise (to the left).
- Important Note on Direction: Unlike tilt-head models, where you’re directly moving the beater, here you’re moving the bowl. Therefore, clockwise lowers the bowl for more beater contact, and counter-clockwise raises the bowl for less beater contact.
- Test and Repeat: Raise the bowl into position, perform the dime test, and fine-tune with small adjustments until optimal clearance is achieved.
For Kenwood Stand Mixers (and similar brands)
While specific mechanisms vary by model, many Kenwood machines offer an adjustment via the attachment shaft itself.
- Prepare for Adjustment: Unplug your stand mixer. Raise the mixer head and remove the attachment.
- Locate the Adjustment Mechanism: On many Kenwood models, there’s a nut or collar on the attachment shaft itself that controls the height. You may need a suitable wrench.
- Adjusting the Attachment Height:
- Loosen the nut or collar sufficiently to allow the shaft to move.
- To lower the tool (closer to the bowl), turn the attachment shaft counter-clockwise.
- To raise the tool (away from the bowl), turn the attachment shaft clockwise.
- Tighten and Test: Once you’ve made a small adjustment, hold the attachment firmly, tighten the nut securely, and re-attach it to the mixer. Lower the head, place the bowl, and perform a test (like the dime test or simply observing with a small amount of liquid). Repeat as necessary.
- Note: Kenwood generally advises no adjustment is necessary for the dough hook.
5. Troubleshooting and Fine-Tuning Your Stand Mixer’s Clearance
Sometimes, the initial adjustment might not yield perfect results, or you might encounter specific challenges.
- Persistent Scraping or Unmixed Spots: If, after adjustment, you still hear scraping or see ingredients left behind, re-evaluate your dime test. You might need to make another minute turn in the appropriate direction. Remember, precision is key.
- Over-Adjusting: It’s easy to turn the screw too much, leading to the opposite problem. If this happens, simply adjust in the reverse direction with even smaller increments.
- Unusual Noises Persist: If, even after achieving proper beater-to-bowl clearance, your stand mixer continues to make unusual noises or exhibits excessive vibration, there might be a deeper mechanical issue beyond simple adjustment. This could involve worn gears, bearings, or other internal components.
- When to Seek Professional Help: If you’ve diligently followed the adjustment steps for your specific model and are still experiencing problems, or if you notice any other signs of mechanical trouble (e.g., burning smell, motor struggling), it’s time to consult a qualified stand mixer technician. As an expert in the field, I can attest that sometimes, a professional diagnosis is the safest and most efficient path to getting your stand mixer back to perfect working order.
6. Beyond Adjustment: Maintaining Optimal Stand Mixer Performance
Proper beater-to-bowl clearance is a cornerstone of stand mixer maintenance, but it’s part of a larger ecosystem of care that ensures longevity and peak performance.
- Regular Cleaning and Inspection: Always clean your stand mixer and its attachments thoroughly after each use. Food residue can build up in attachment grooves or around the adjustment mechanisms, potentially hindering future adjustments or affecting performance.
- Proper Use of Attachments: Ensure you’re using the correct attachment for the task at hand. While the flat beater is best for general mixing and the dime test, using the dough hook for heavy doughs and the wire whisk for aerating will prevent unnecessary strain on the motor and attachments, preserving their alignment.
- Storage Tips: Store your stand mixer in a clean, dry place. Avoid placing heavy items on top of the mixer head, especially for tilt-head models, as this could subtly alter its alignment over time.
- Connection to Overall Health: A well-maintained stand mixer, including proper beater-to-bowl clearance and regular cleaning, contributes to the overall “health” of the appliance. This also extends to food safety, as thorough mixing prevents uneven cooking or growth of bacteria in unmixed pockets of ingredients.
Conclusion
Achieving the perfect beater-to-bowl clearance in your stand mixer is a simple yet profoundly impactful step in ensuring consistent, high-quality results in your kitchen. From preventing sticky messes to extending the lifespan of your cherished appliance, this seemingly small adjustment holds immense value. By understanding the ‘dime test’ and mastering the specific adjustment techniques for your stand mixer model, you empower yourself to troubleshoot common issues and maintain your machine like a pro. Don’t let uneven mixes hold you back; take control of your stand mixer’s performance today. What culinary masterpiece will you create now that your stand mixer is perfectly calibrated?
Frequently Asked Questions
How often should I check my stand mixer’s beater-to-bowl clearance?
It’s a good practice to check your stand mixer’s clearance every few months, or whenever you notice ingredients sticking to the bottom of the bowl, hear scraping noises, or observe uneven mixing. Regular checks ensure consistent performance.
Can different attachments (whisk, dough hook) require different clearances?
While the flat beater is typically used for the primary adjustment, other attachments like the whisk or dough hook usually operate effectively at the same calibrated height. However, some advanced bakers might make minor adjustments for specialized tasks, though this is generally not necessary for everyday use.
What if my stand mixer doesn’t have a visible adjustment screw?
Some older or less common stand mixer models might not have an easily accessible external adjustment screw. In such cases, consult your owner’s manual for specific instructions or contact the manufacturer’s support. Avoid attempting unauthorized internal adjustments, as this could void warranties or damage the machine.
Is it normal for a stand mixer to make some noise during operation?
Yes, it’s normal for a stand mixer to produce some operational noise, especially when mixing heavy doughs or running at higher speeds. However, listen for unusual sounds like grinding, scraping, or excessive rattling, which can indicate an issue with clearance or internal components.
Can adjusting the clearance improve the lifespan of my stand mixer?
Absolutely. Proper beater-to-bowl clearance reduces unnecessary stress on the stand mixer’s motor and gears by preventing the attachment from grinding against the bowl. This not only improves mixing efficiency but also significantly contributes to the longevity and durability of your appliance.