A stand mixer is a cornerstone of many kitchens, transforming laborious tasks like kneading dough and whipping cream into effortless culinary pursuits. From the enthusiastic home baker to the bustling small business, this powerful appliance is an invaluable asset. However, even the most robust stand mixers are susceptible to damage if not used and maintained correctly. After years of hands-on experience, testing, and even repairing countless models, it’s clear that many common habits can inadvertently shorten your mixer’s lifespan. Understanding these pitfalls is the first step to ensuring your stand mixer remains a reliable companion in your kitchen for years to come.
Understanding Your Stand Mixer: A Foundation for Longevity
|
Our Picks for the Best Stand mixer in 2026
As an Amazon Associate I earn from qualifying purchases.
|
||
| Num | Product | Action |
|---|---|---|
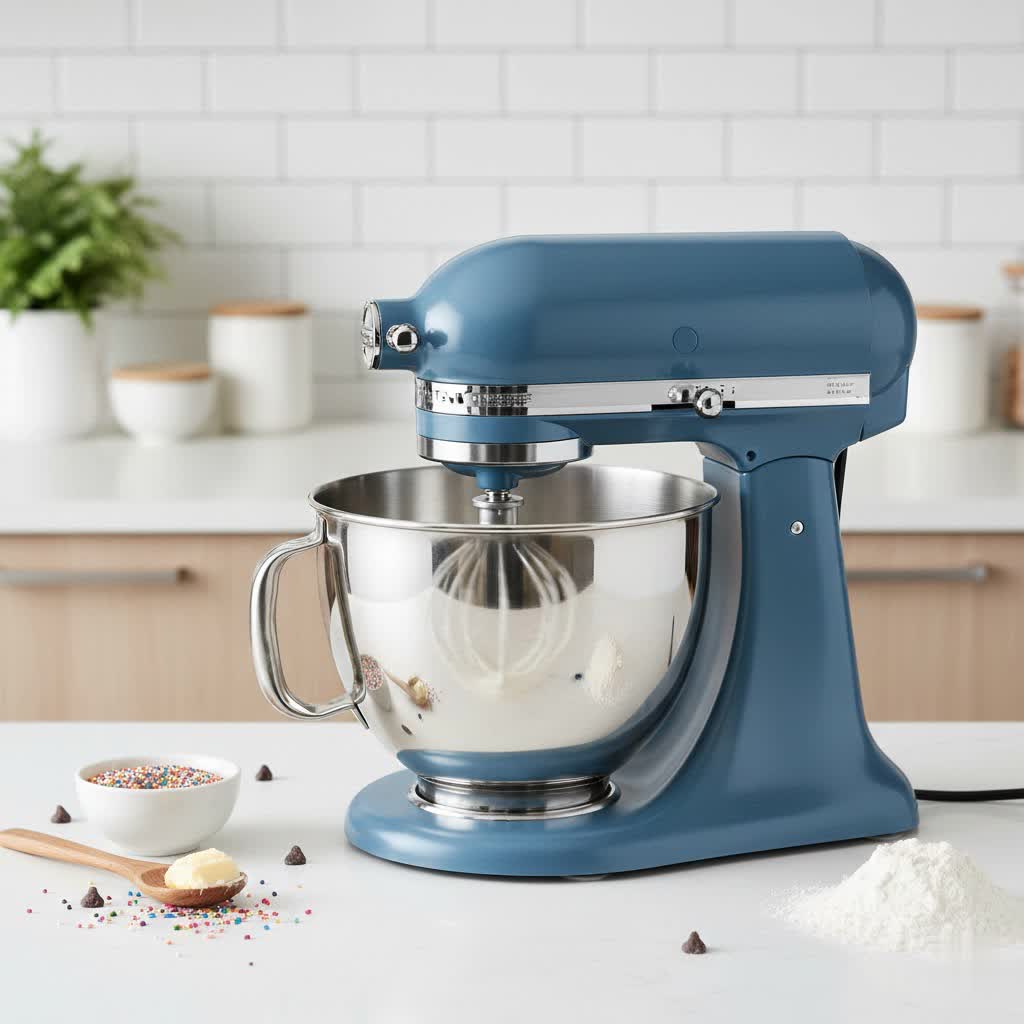
| 1 | KitchenAid Artisan Series 5 Quart Tilt Head Stand Mixer, KSM150PS, Juniper |

|
| 2 | Stand Mixer, Kitchen in the box 3.2Qt Small Electric Food Mixer,6 Speeds Portable Lightweight Kitchen Mixer for Daily Use with Egg Whisk,Dough Hook,Flat Beater (Purple) |
|
| 3 | Hamilton Beach Electric Stand Mixer, 4 Quarts, Dough Hook, Flat Beater Attachments, Splash Guard 7 Speeds with Whisk, Black |
|
| 4 | KitchenAid Classic Series 4.5 Quart Tilt-Head Stand Mixer K45SS, Onyx Black |
|
| 5 | Hamilton Beach Electric Stand Mixer, 4 Quarts, Dough Hook, Flat Beater Attachments, Splash Guard, 7 Speeds with Whisk, Easy-Carry Top Handle, Red |
|
| 6 | Stand Mixer Body with Stainless Steel Cladding Pro-Grade Powerful Kitchen Mixer for Baking Bread Dough Cake 10+p Speed Tilt-Head Electric Food Mixer With 6.5QT Bowl Dough Hook Wire Whisk Flat Beater |
|
| 7 | Martha Stewart Tilt-Head Stand Mixer, 12 Speed, 5.3QT Stainless Steel Bowl, Splash Guard with Pour Chute, Whisk, Dough Hook, Flat Beater, Electric Kitchen Baking Mixer, Bread, Cake, Whip, Linen White |
|
| 8 | Camic Stand Mixer, 4.2QT+5.3QT Two bowls Electric Food Mixer, 10 Speeds with Digital setting 3-IN-1 Kitchen Mixer for Baking Cakes Cookie Bread Salad with Egg Whisk,Dough Hook,Flat Beater (Black) |
|
| 9 | Kitchen in the box Stand Mixer,3.2Qt Small Electric Food Mixer,6 Speeds Portable Lightweight Kitchen Mixer for Daily Use with Egg Whisk,Dough Hook,Flat Beater (Black) |
|
| 10 | KitchenAid Classic Series 4.5 Quart Tilt-Head Stand Mixer K45SS, White |
|
Before delving into common mistakes, it’s essential to appreciate what makes a stand mixer tick. At its heart, a stand mixer is a motor-driven appliance designed to mix, beat, and knead ingredients with precision and power. Different models offer varying motor strengths and bowl capacities, each suited for specific tasks and usage frequencies. Knowing the capabilities and limitations of your particular model is paramount. Always consult your owner’s manual – it’s your definitive guide to understanding its unique features, optimal speeds, and recommended capacities, laying the groundwork for proper care and use.
Operational Blunders: How Everyday Use Can Lead to Damage
Many stand mixer breakdowns stem from seemingly minor operational oversights that accumulate over time.
Ignoring Bowl Clearance
One of the most frequent yet overlooked issues is incorrect beater-to-bowl clearance. This refers to the precise distance between your attachment (beater, whisk, or dough hook) and the bottom and sides of the mixing bowl. If the attachment sits too high, ingredients at the bottom remain unmixed, leading to inconsistent results. Conversely, if it’s too low, the attachment can scrape the bowl, causing unsightly scratches or, worse, damaging the attachment or the mixer’s mechanism.
To check and adjust, perform the “dime test”: Place a dime in an empty mixer bowl. With the paddle attachment secured and the mixer running on its lowest speed, the dime should slowly travel around the bowl, barely moving. If it stays put, the attachment is too high; if it whips quickly around, it’s too low. Most stand mixers have an adjustment screw on the neck or head, allowing you to fine-tune this crucial distance. A perfectly adjusted clearance ensures efficient mixing and prevents unnecessary wear and tear.
Overfilling or Underfilling the Bowl
The large capacity of a stand mixer bowl can be tempting, but overfilling it is a common mistake that strains the motor and can lead to messy overflows. When the bowl is too full, the motor struggles to move the dense ingredients, generating excessive heat and stress on its internal components. This can accelerate gear wear and even lead to motor burnout. For wet ingredients, aim to fill the bowl no more than two-thirds full, and for dry ingredients, stick to three-quarters. This allows ample space for ingredients to expand and circulate properly, ensuring thorough mixing without overworking the machine.
Conversely, underfilling the bowl can also be problematic. If the quantity of ingredients is too small, especially with stiff batters, the attachments may not effectively catch and mix them, leading to uneven results. While some models offer smaller bowls for minor tasks, for very small amounts, a hand mixer might be the more suitable tool.
Improper Speed Control
The temptation to crank up the speed for faster mixing is strong, but it’s a habit that can severely damage your stand mixer. Starting at high speed, especially with dry ingredients, often results in a “flour explosion,” coating your kitchen in a powdery mess. More critically, consistently using high speeds for heavy-duty tasks like kneading thick dough can overload the motor and strip the gears.
Stand mixers are designed with various speed settings for a reason. Always start on the lowest speed to incorporate ingredients gently, then gradually increase it as needed. For robust tasks like kneading bread dough, stick to lower speeds (typically speed 2 or lower on many models) to prevent motor strain and gear damage. “Motors can burn out from treating dough like cake batter,” as one expert notes, emphasizing that gear wear is often preventable by respecting speed limits.
Using the Wrong Attachments
Most stand mixers come with three primary attachments: a flat beater, a wire whisk, and a dough hook, each designed for a specific purpose. Using the wrong attachment for a task can be highly inefficient and even damaging.
- Flat Beater (Paddle): Your everyday workhorse for normal to heavy mixtures like cake batter, cookie dough, and mashed potatoes.
- Wire Whisk: Ideal for incorporating air into ingredients, such as whipping egg whites for meringue, making whipped cream, or light frostings. Using it for dense doughs can bend or break the delicate wires.
- Dough Hook: Specifically engineered to knead yeasted doughs, mimicking hand kneading to develop gluten effectively. Using the paddle for heavy dough can overtax the motor and damage it.
Always match the attachment to the recipe’s requirements. This not only ensures optimal results but also protects your mixer from undue stress.
Leaving the Mixer Unattended or Overworking It
The hands-free convenience of a stand mixer is a major benefit, but it doesn’t mean you can walk away entirely. Stand mixers, particularly when handling stiff doughs or large batches, can sometimes wobble or “walk” across the countertop, risking a fall that could severely damage the appliance or your kitchen.
Furthermore, leaving the mixer running for excessively long periods, especially under heavy loads, can cause the motor to overheat. If your mixer feels warm to the touch, starts to smell, or makes unusual noises, it’s a clear sign of overwork. Give it a break! Allowing it to cool down for 20-30 minutes can prevent motor burnout and extend its life. For high-speed whipping, a break after 10 minutes is often advisable, while lower speeds might handle up to 20 minutes continuously.
Mixing Unsuitable Ingredients
While versatile, a stand mixer is not a universal kitchen tool. Attempting to mix ingredients it’s not designed for can lead to immediate damage. Avoid:
- Frozen or Rock-Hard Ingredients: Trying to break down frozen butter or solid blocks of chocolate can strip gears or damage attachments. Always bring ingredients to the recommended temperature.
- Hot Liquids: Introducing very hot liquids can be risky for the mixer’s internal components and create steam that condenses on the circuit board, potentially causing a temporary shutdown or long-term damage.
- Non-Mixing Tasks: A stand mixer is not a food processor or a blender. Forcing it to perform tasks like finely chopping nuts or pureeing tough ingredients can strain the motor and isn’t effective.
“If you wouldn’t do it with a wooden spoon, don’t do it with a mixer.” – Anthony Gomand, KitchenAid Expert
This simple advice is a great rule of thumb to follow for your mixer’s longevity.
Maintenance Missteps: Shortcuts That Shorten Lifespan
Beyond operational errors, neglecting basic care and maintenance can significantly shorten your stand mixer’s life.
Neglecting Regular Cleaning
Proper cleaning is not just about hygiene; it’s vital for your mixer’s performance. Food particles, grease, and sugar residue can accumulate in crevices and around moving parts, hindering smooth operation and potentially leading to component failure.
After each use, unplug your mixer, remove the bowl and attachments, and wash them thoroughly. Most bowls are dishwasher-safe, but always check your manual for attachments. Some, like aluminum flat beaters or wire whips, can tarnish or corrode in a dishwasher and are best hand-washed. Wipe down the mixer head and base with a damp cloth, paying attention to the attachment hub and speed lever. For stubborn spots, a mild cleaner or a baking soda paste can work wonders. A deep clean, including using toothpicks or Q-tips to clear gunk from the planetary hub and hinge areas, should be performed periodically.
Improper Storage
How you store your stand mixer can impact its condition. If left on the counter, consider using a cover to protect it from dust, splatters, and minor scratches. When storing it in a cupboard, avoid tightly wrapping the power cord around the base. Loose loops are best to prevent internal wire damage. Also, store the mixer upright; laying it on its side can cause grease to leak from the gearbox, indicating a potential issue that needs addressing.
Skipping Lubrication Checks
Just like any intricate machinery, a stand mixer relies on proper lubrication for its gears to function smoothly. Over time, the internal grease can dry out, harden, or leak, leading to increased friction, grinding noises, and accelerated wear. While not a daily task, if you notice squeaking or grinding sounds, or see grease leaking, it’s a sign that internal lubrication may be insufficient or compromised. Professional servicing or a DIY re-greasing with food-grade lubricant can prevent costly gear replacements. Ensure all moving parts, particularly the planetary shaft, are adequately greased according to manufacturer guidelines.
Overlooking Loose Parts & Electrical Safety
The constant vibrations from mixing can loosen screws and bolts over time. Periodically inspect your mixer for any wobbly parts, especially the bowl clamp and attachment hub, and tighten them as needed.
Crucially, never plug your stand mixer into a power strip. Stand mixers draw significant power, far more than most power strips are designed to handle. This can overload the strip, leading to short circuits, fire hazards, and potential damage to your mixer’s motor and electronics, which may void its warranty. Always plug your stand mixer directly into a wall outlet. Regularly inspect the power cord for any fraying, cuts, or damage, and replace it immediately if found.
Choosing Wisely: Preventing Future Breakdowns at the Source
Sometimes, the “mistake” begins before the first batch of dough is even mixed – by choosing the wrong stand mixer for your needs.
Selecting the Wrong Model for Your Needs
A compact stand mixer might be perfect for occasional light baking, but if you frequently make large batches of heavy bread dough or run a small baking business, a residential model will quickly be overworked. This constant strain leads to premature motor and gear failure. Consider:
- Capacity: Match bowl size to your typical batch sizes.
- Motor Power (Wattage): Higher wattage generally indicates more power for demanding tasks.
- Drive System: Direct drive motors are often more durable and efficient for heavy loads compared to belt-driven systems.
- Construction: Heavy-duty, all-metal gears are more robust than plastic components, especially for frequent, intensive use.
Investing in a mixer that aligns with your baking habits will save you frustration and repair costs in the long run.
Troubleshooting Early Warning Signs
Even with the best care, sometimes issues arise. Knowing what to look for can help you address problems before they escalate into complete breakdowns.
- Grinding, Squealing, or Rattling Noises: These often indicate worn-down gears or a lack of internal lubrication.
- Oil or Grease Leaks: A clear sign that the gearbox grease is breaking down or seals are failing, requiring immediate attention.
- Inconsistent Speeds or Not Spinning: This could point to motor capacitor problems, internal wiring faults, or stripped gears (often a nylon gear designed to fail as a safeguard against motor damage).
- Mixer Won’t Turn On: Check the power cord, outlet, and circuit breaker. If these are fine, it might be an internal wiring issue or worn carbon brushes in the motor.
Addressing these symptoms promptly can prevent minor annoyances from becoming major repairs.
Conclusion
Your stand mixer is a significant investment and a valuable tool that can bring joy and efficiency to your kitchen. By avoiding these common mistakes – from neglecting proper bowl clearance and speed control to overlooking regular cleaning and maintenance – you can drastically extend its lifespan. Understand your machine, respect its limitations, and provide it with the care it deserves. A well-maintained stand mixer isn’t just an appliance; it’s a legacy that can be passed down through generations of bakers. Invest a little time in prevention, and your stand mixer will reward you with countless batches of perfectly mixed creations.
Frequently Asked Questions
Can I put my stand mixer attachments in the dishwasher?
It depends on the attachment and material. Stainless steel bowls and some coated attachments are often dishwasher-safe. However, aluminum attachments (like many flat beaters) and delicate wire whisks can tarnish, discolor, or corrode in the dishwasher due to harsh detergents and high heat. Always check your mixer’s manual for specific cleaning instructions. When in doubt, hand wash with warm, soapy water.
Why does my stand mixer motor get warm during use?
It’s normal for the motor head of your stand mixer to feel warm, especially during heavy loads or extended mixing periods. This is a sign that the motor is working hard. However, if it becomes uncomfortably hot to touch, starts smelling like burning, or automatically shuts off, it’s a sign of overheating due to overwork. Give your mixer a break to cool down for at least 30 minutes before resuming use.
How often should I perform a deep clean and lubrication on my stand mixer?
While wiping down the exterior and washing attachments should happen after every use, a thorough deep clean is recommended monthly or after intensive use. For internal lubrication, it’s less frequent. Many manufacturers suggest professional servicing for re-greasing every few years, or if you notice grinding noises or grease leaks. For specific guidance, always refer to your stand mixer’s manual.