Imagine the rich aroma of freshly made pasta wafting through your kitchen, a dish that feels both gourmet and comforting. While the idea of crafting pasta from scratch might seem daunting, involving extensive kneading and rolling by hand, your stand mixer is here to transform this culinary ambition into an enjoyable reality. With the right attachments, your stand mixer makes the process remarkably simple, allowing you to create tender, flavorful pasta that elevates any meal. This comprehensive guide will walk you through every step, from selecting ingredients to shaping perfect noodles, ensuring your homemade pasta experience is nothing short of delightful.
Understanding Your Stand Mixer for Pasta Making
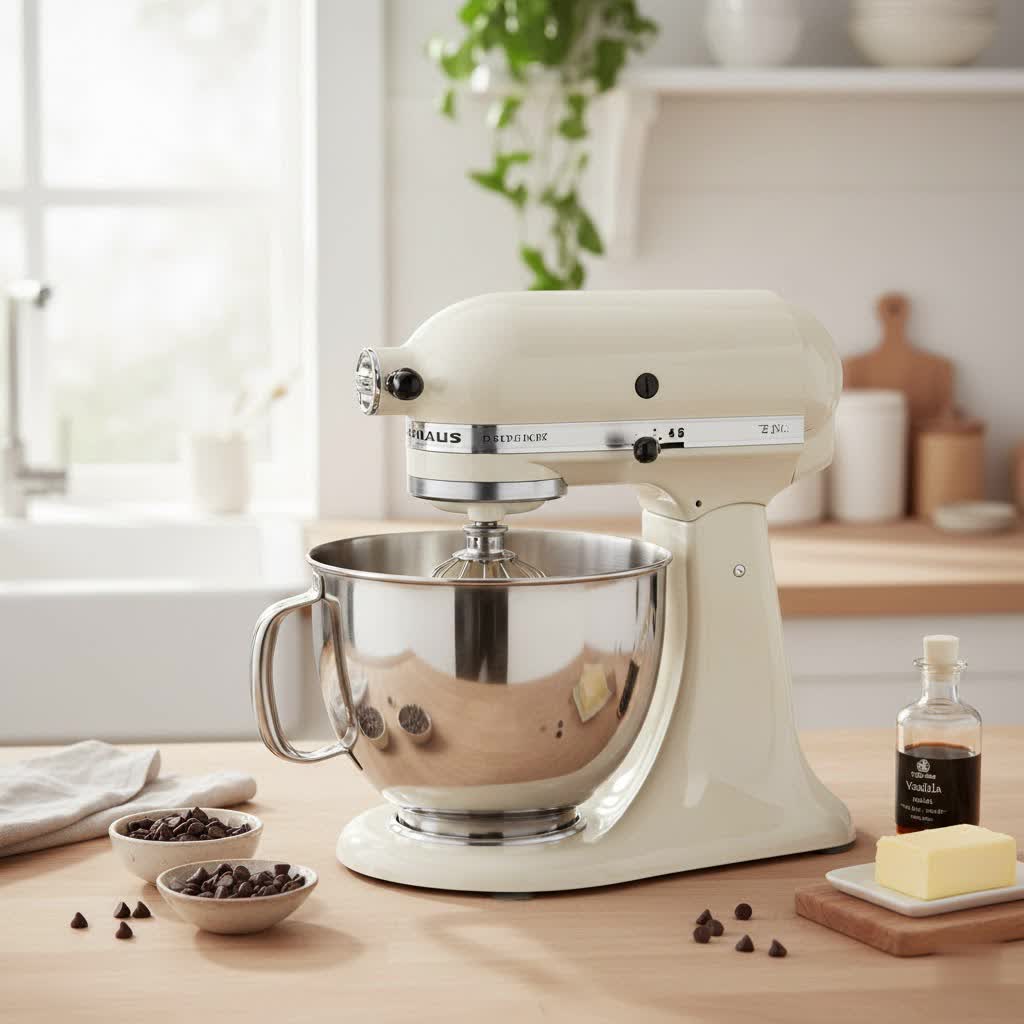
Before diving into dough creation, it’s essential to understand how your stand mixer, particularly with its specialized attachments, becomes your most valuable tool in pasta making. A stand mixer automates much of the labor-intensive work, offering consistent results and freeing up your hands for other tasks.
For pasta dough, you’ll primarily use two standard attachments that come with most stand mixers:
- Flat Beater (Paddle Attachment): This is used for the initial mixing of your ingredients, bringing the flour and liquids together into a shaggy dough.
- Dough Hook: Once the ingredients are combined, the dough hook takes over, expertly kneading the dough to develop the gluten, resulting in a smooth, elastic consistency.
Beyond these standard tools, specialized pasta attachments are game-changers for shaping:
- Pasta Roller Attachment: This indispensable attachment presses and thins your dough into uniform sheets. It features adjustable settings, allowing you to gradually decrease thickness until you reach your desired pasta sheet.
- Pasta Cutter Attachments: Often sold as a set with the roller or separately, these attachments transform your sheets into various pasta shapes like fettuccine, spaghetti, or even linguine. Some stand mixers also offer a pasta press for extruded shapes like macaroni or rigatoni.
The benefit of using a stand mixer for pasta extends beyond mere convenience. It ensures uniform mixing and kneading, crucial for achieving the perfect pasta texture, and provides a stable, hands-free operation when rolling and cutting.
Gathering Your Ingredients: The Perfect Pasta Dough Recipe
The beauty of fresh pasta lies in its simplicity, requiring just a few high-quality ingredients. The basic recipe is forgiving, but understanding each component helps you achieve optimal results.
Core Ingredients:
- Flour: The foundation of your pasta.
- All-Purpose Flour: Widely available and produces good, versatile pasta.
- “00” Flour: A finely milled Italian flour that creates exceptionally silky and tender pasta. Many enthusiasts consider it the gold standard for fresh pasta.
- Semolina Flour (Durum Wheat Semolina): Coarser than “00” flour, semolina adds a firmer texture and a slightly nutty flavor, ideal for robust pasta types. You can use it alone for eggless pasta or blend it with “00” or all-purpose flour.
- Eggs: Provide moisture, richness, and elasticity to the dough. Large eggs are typically used. The yolks contribute richness, while the whites add elasticity.
- Salt: Enhances the flavor of the pasta itself.
- Water/Olive Oil (Optional): A small amount of water may be needed to adjust dough consistency, especially with larger batches or drier climates. A touch of extra virgin olive oil can add richness and smoothness.
Flour-to-Egg Ratio:
A general guideline for egg pasta is 1 large egg per 100 grams (approximately 1 cup) of flour. However, this is not an exact science due to variations in egg size, flour absorption, and ambient humidity. Always be prepared to adjust slightly. For example, a common recipe for two servings might use 2 large eggs and 200g of flour.
Step-by-Step: Crafting Your Pasta Dough with a Stand Mixer
Making the dough is the first and most critical step. Your stand mixer significantly simplifies this process, ensuring a perfectly kneaded dough with minimal effort.
1. Initial Mixing (Flat Beater)
- Combine Dry Ingredients: In your stand mixer bowl, combine your chosen flour and salt. If using, create a small well in the center of the flour.
- Add Wet Ingredients: Crack the eggs into the well (or directly into the bowl with the flour), and add any optional olive oil or initial water.
- Mix: Attach the flat beater to your stand mixer. Start mixing on a low speed (e.g., Speed 2) for about 30-60 seconds. The ingredients will gradually come together, forming a shaggy, crumbly dough. If the mixture appears too dry, add a small amount of water (½ to 1 tablespoon at a time) until it starts to form a cohesive mass.
|
Our Picks for the Best Stand mixer in 2026
As an Amazon Associate I earn from qualifying purchases.
|
||
| Num | Product | Action |
|---|---|---|
| 1 | KitchenAid Artisan Series 5 Quart Tilt Head Stand Mixer, KSM150PS, Juniper |

|
| 2 | KitchenAid Classic Series 4.5 Quart Tilt-Head Stand Mixer K45SS, White |
|
| 3 | Stand Mixer Body with Stainless Steel Cladding Pro-Grade Powerful Kitchen Mixer for Baking Bread Dough Cake 10+p Speed Tilt-Head Electric Food Mixer With 6.5QT Bowl Dough Hook Wire Whisk Flat Beater |
|
| 4 | Hamilton Beach Electric Stand Mixer, 4 Quarts, Dough Hook, Flat Beater Attachments, Splash Guard, 7 Speeds with Whisk, Easy-Carry Top Handle, Red |
|
| 5 | Kitchen in the box Stand Mixer,3.2Qt Small Electric Food Mixer,6 Speeds Portable Lightweight Kitchen Mixer for Daily Use with Egg Whisk,Dough Hook,Flat Beater (Black) |
|
| 6 | Hamilton Beach Electric Stand Mixer, 4 Quarts, Dough Hook, Flat Beater Attachments, Splash Guard 7 Speeds with Whisk, Black |
|
| 7 | Camic Stand Mixer, 4.2QT+5.3QT Two bowls Electric Food Mixer, 10 Speeds with Digital setting 3-IN-1 Kitchen Mixer for Baking Cakes Cookie Bread Salad with Egg Whisk,Dough Hook,Flat Beater (Black) |
|
| 8 | KitchenAid Classic Series 4.5 Quart Tilt-Head Stand Mixer K45SS, Onyx Black |
|
| 9 | Stand Mixer, Kitchen in the box 3.2Qt Small Electric Food Mixer,6 Speeds Portable Lightweight Kitchen Mixer for Daily Use with Egg Whisk,Dough Hook,Flat Beater (Purple) |
|
| 10 | Martha Stewart Tilt-Head Stand Mixer, 12 Speed, 5.3QT Stainless Steel Bowl, Splash Guard with Pour Chute, Whisk, Dough Hook, Flat Beater, Electric Kitchen Baking Mixer, Bread, Cake, Whip, Linen White |
|
2. Kneading (Dough Hook)
- Switch Attachments: Remove the flat beater and replace it with the dough hook.
- Knead: Turn the mixer to a low-medium speed (e.g., Speed 2) and let it knead for 5 to 7 minutes. The dough will transform from a shaggy mass into a smooth, elastic ball that pulls away cleanly from the sides of the bowl.
- Observation: The dough should feel firm but pliable. If it’s too sticky, add a teaspoon of flour at a time. If it’s too dry and crumbly, add a teaspoon of water.
- Manual Touch (Optional but Recommended): For an even better texture and to gauge readiness, remove the dough from the mixer and knead it by hand on a lightly floured surface for 1-2 minutes. This brief manual kneading helps align the gluten strands, resulting in a more pliable and resilient dough. The dough should feel smooth, elastic, and spring back slowly when poked.
3. Resting the Dough
- Wrap and Rest: Form the dough into a smooth ball or disc. Tightly wrap it in plastic wrap or place it in an airtight container. Allow it to rest at room temperature for at least 20-30 minutes, or up to an hour.
- Why Rest? Resting is crucial. It allows the gluten to relax, making the dough much easier to roll out thinly without tearing or shrinking back. Skipping this step can lead to frustration during the rolling phase.
Rolling and Cutting: Shaping Your Fresh Pasta
Once your dough is rested and ready, it’s time for the fun part: transforming it into beautiful pasta sheets and shapes using your stand mixer attachments.
1. Preparing the Dough for Rolling
- Divide: Unwrap your rested dough. On a lightly floured surface, cut the dough into 3-4 manageable pieces. Keep the unused portions covered with plastic wrap to prevent them from drying out.
- Flatten: Take one piece of dough and flatten it into a rough rectangle or oval shape with your hands or a rolling pin. This makes it easier to feed into the pasta roller. Lightly dust with flour.
2. Rolling with the Pasta Roller Attachment
- Attach Roller: Secure the pasta roller attachment to the power hub of your stand mixer.
- Start Thick: Set the pasta roller to its widest setting (usually #1 or #0, depending on your model). Turn the mixer to a low speed (e.g., Speed 2).
- First Pass: Feed one flattened dough piece through the roller. It will come out thicker and a bit uneven.
- Fold and Repeat: Fold the dough into thirds, like a letter, and feed it through the widest setting again. Repeat this folding and rolling on the widest setting 2-3 more times. This helps to further knead the dough, square off the edges, and achieve a consistent texture.
- Gradually Thin: Without folding, progressively decrease the roller setting one notch at a time (e.g., from #1 to #2, then #2 to #3, and so on). Pass the dough sheet through each setting once or twice.
- Tip: Lightly flour the dough sheet between each pass if it becomes sticky.
- Desired Thickness: Continue until you reach your desired pasta thickness, typically settings #5-7 for most pasta types like fettuccine or lasagna. The sheet should be thin enough to be somewhat translucent.
- Support Long Sheets: As the pasta sheets get longer, gently support them with one hand as they emerge from the roller to prevent tearing.
3. Cutting with Pasta Cutter Attachments
- Switch Attachments: Once you have your perfectly thinned pasta sheets, remove the pasta roller attachment and install your desired pasta cutter (e.g., fettuccine or spaghetti cutter).
- Cut Noodles: Turn the mixer to a low speed (e.g., Speed 2). Feed the pasta sheet through the cutter. The machine will automatically slice the sheet into individual noodles.
- Collect and Dust: As the noodles emerge, gently catch them and dust them generously with semolina flour or all-purpose flour to prevent sticking. Form them into loose nests or lay them flat on a floured baking sheet or pasta drying rack.
- Repeat: Continue with the remaining dough pieces until all your fresh pasta is made.
Cooking and Storing Your Homemade Pasta
Having gone through the effort of making fresh pasta, you’ll want to cook and store it properly to enjoy its deliciousness.
Cooking Fresh Pasta
Fresh pasta cooks significantly faster than dried pasta.
- Boil Water: Bring a large pot of generously salted water to a rolling boil.
- Cook: Carefully add your fresh pasta to the boiling water. Stir gently to prevent sticking.
- Al Dente: Cook for only 2-4 minutes, or until the pasta is al dente (firm to the bite). Thinner pasta shapes will cook faster.
- Serve: Drain immediately and toss with your favorite sauce.
Drying Fresh Pasta
If you’re not cooking all your pasta immediately, a little drying can help.
- Short Dry: For immediate use within a few hours, spread the pasta on a lightly floured surface or hang it on a pasta drying rack for about 20-30 minutes. This allows it to firm up slightly and prevents sticking.
- Longer Dry (for storage): For longer storage, you can dry pasta completely. Hang it on a drying rack for several hours or overnight until brittle.
Storing Fresh Pasta
- Immediate Use: Best cooked within a few hours of making.
- Refrigeration: Fresh, uncooked pasta can be stored in an airtight container in the refrigerator for 1-2 days. Ensure it’s well-dusted with flour to prevent sticking.
- Freezing: This is the best method for longer storage.
- Nests: Form individual nests of pasta, then arrange them in a single layer on a parchment-lined baking sheet. Freeze until solid (about 30 minutes to 1 hour).
- Airtight Storage: Once frozen, transfer the solid pasta nests to a freezer-safe bag or airtight container. It can be stored for up to 1 month. Cook directly from frozen, adding a minute or two to the cooking time.
Troubleshooting and Expert Tips for Perfect Pasta
Even seasoned pasta makers encounter small hurdles. Here’s how to navigate common issues and perfect your technique.
Common Issues and Fixes:
- Dough is too sticky: If the dough sticks to your hands or the mixer bowl, add a tablespoon of flour at a time until it reaches a manageable consistency.
- Dough is too dry or crumbly: If the dough isn’t coming together or crumbles during kneading, add a teaspoon of water at a time until it forms a cohesive mass.
- Dough tears during rolling: This often means the dough needs more resting time to relax the gluten, or it wasn’t kneaded enough. Sometimes, the dough might be too dry; lightly mist with water before rerolling.
- Pasta sheets stick together: Ensure adequate flour dusting between each pass through the roller and when collecting cut noodles. Don’t overcrowd the drying rack or baking sheet.
- Attachments getting clogged: If dough builds up on the rollers or cutters, stop the mixer. Do not use water to clean them immediately. Allow the dough to dry and then brush it off with a stiff brush or wooden skewer.
Expert Tips for Success:
- Work in Batches: Especially when rolling and cutting, process one piece of dough at a time and keep the remaining dough covered to prevent drying.
- Flour, Flour, Flour (But Not Too Much): Use just enough flour to prevent sticking, but avoid excessive flour, which can make the pasta tough. Semolina flour is excellent for dusting as it’s coarser and less likely to be absorbed by the dough.
- Embrace Imperfection: Your first batch might not be perfect, and that’s okay! Homemade pasta is a skill that improves with practice.
- Humidity Matters: On humid days, you might need slightly more flour in your dough, and pasta may take longer to dry.
- Clean Attachments Properly: Pasta attachments are generally not dishwasher-safe. Allow any dough residue to dry completely on the attachments, then use a brush or toothpick to remove it. A damp cloth can be used for the exterior, but avoid submerging them in water.
Conclusion
Making fresh pasta at home is a culinary adventure that’s now more accessible than ever, thanks to the efficiency of stand mixer attachments. From the initial mixing and kneading to the satisfying process of rolling and cutting, your stand mixer streamlines each step, allowing you to create delicious, restaurant-quality pasta with ease. The superior texture and flavor of homemade pasta are unparalleled, offering a truly rewarding experience for any home cook. Embrace the journey of crafting your own noodles, experiment with different flours, and savor the incredible taste of fresh pasta, made right in your kitchen.
What delectable sauce will you pair with your first batch of homemade pasta?
Frequently Asked Questions
What stand mixer attachments do I need for pasta?
You’ll need a flat beater for initial mixing, a dough hook for kneading, and specific pasta roller and cutter attachments (often sold as a set) to shape the dough into sheets and noodles.
What kind of flour is best for homemade pasta?
“00” flour is ideal for silky pasta. All-purpose flour is a versatile and accessible option. Semolina flour adds a firmer texture and can be used alone or mixed with other flours.
How long does fresh pasta take to cook?
Fresh pasta cooks very quickly, typically taking only 2-4 minutes in boiling, salted water until it reaches an al dente texture. Thinner pasta shapes will cook faster.
Can I make pasta dough ahead of time?
Yes, you can refrigerate fresh pasta dough, tightly wrapped, for 1-2 days. For longer storage, it’s best to freeze the shaped pasta.
How do I clean pasta attachments?
Allow any dough residue to dry completely on the attachments. Then, use a brush or wooden skewer to remove the dried dough. Avoid using water or putting them in the dishwasher, as this can damage the mechanisms.